Why simplify is your new strategy: How to build your business in one space
Many small service-based businesses start with one goal: to help people. But over time, the behind-the-scenes demands start to stack…

With the way customers book constantly evolving, we want to make sure your business keeps up. That’s why the Setmore app continues to grow. But, great things don’t happen overnight.
While we’re testing new features and integrations from your wishlist, here are 5 amazing hacks to try. Forge your own path to track bookings across multiple branches, introduce coupon codes, skip the staff on your Booking Page, and more.
Does your business have more than one branch or office? Support for multiple locations is one of our most requested features. Rest assured, it’s on the way ?
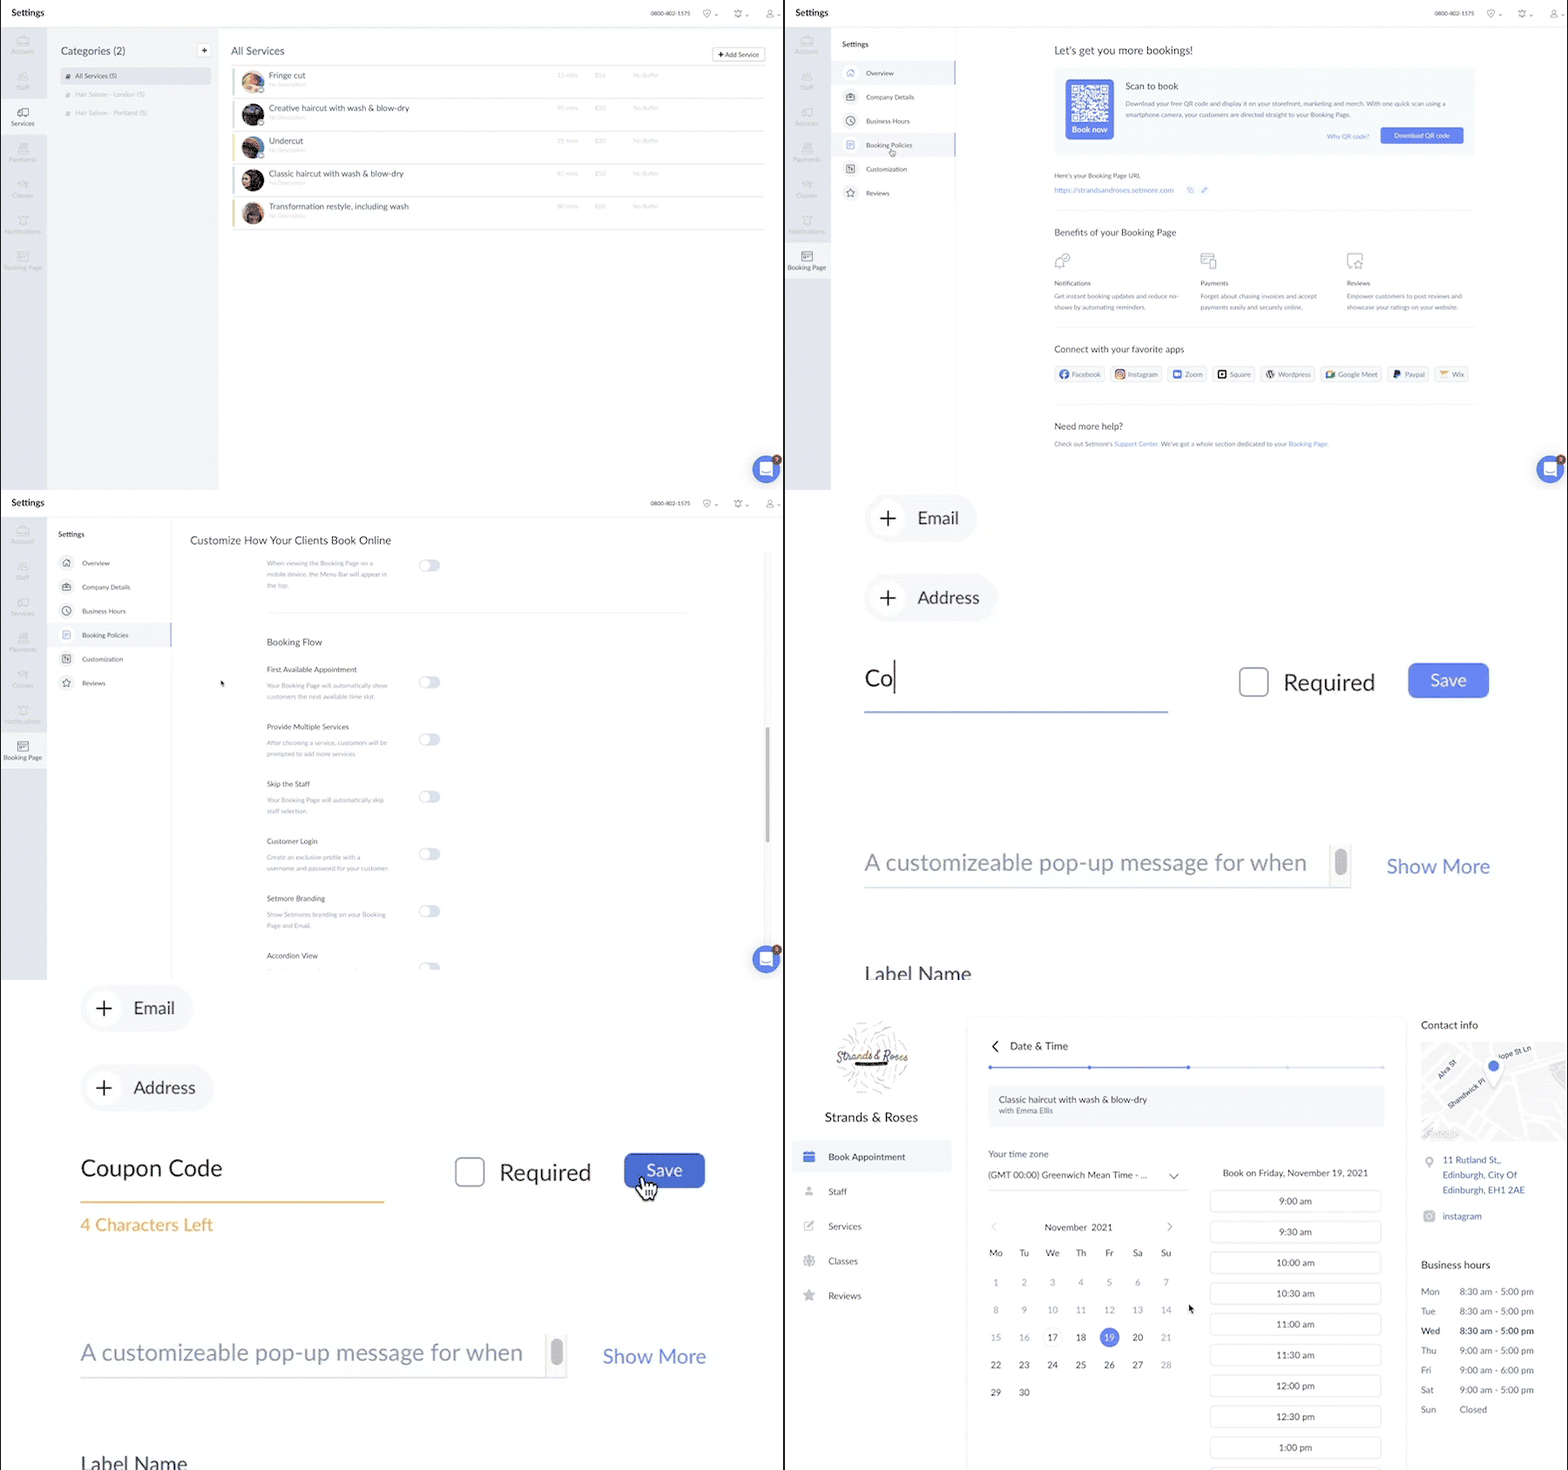
Until then, the easiest solution is to use your service categories as locations.
To get started, navigate to Settings > Services.
1. Click the plus sign (+) to add new categories.
2. Name the new category with the service offered and the location. For example, ‘Bridal Spa – Portland’ or ‘Yoga Studio – London’.
3. Click ‘Add Category’ to save.
4. If you have multiple services offered in the same location, list them under the relevant category.
As you create your services, be sure to designate the right service providers in accordance with each location. Once you’re finished, check out your Booking Page to confirm everything’s ship-shape.
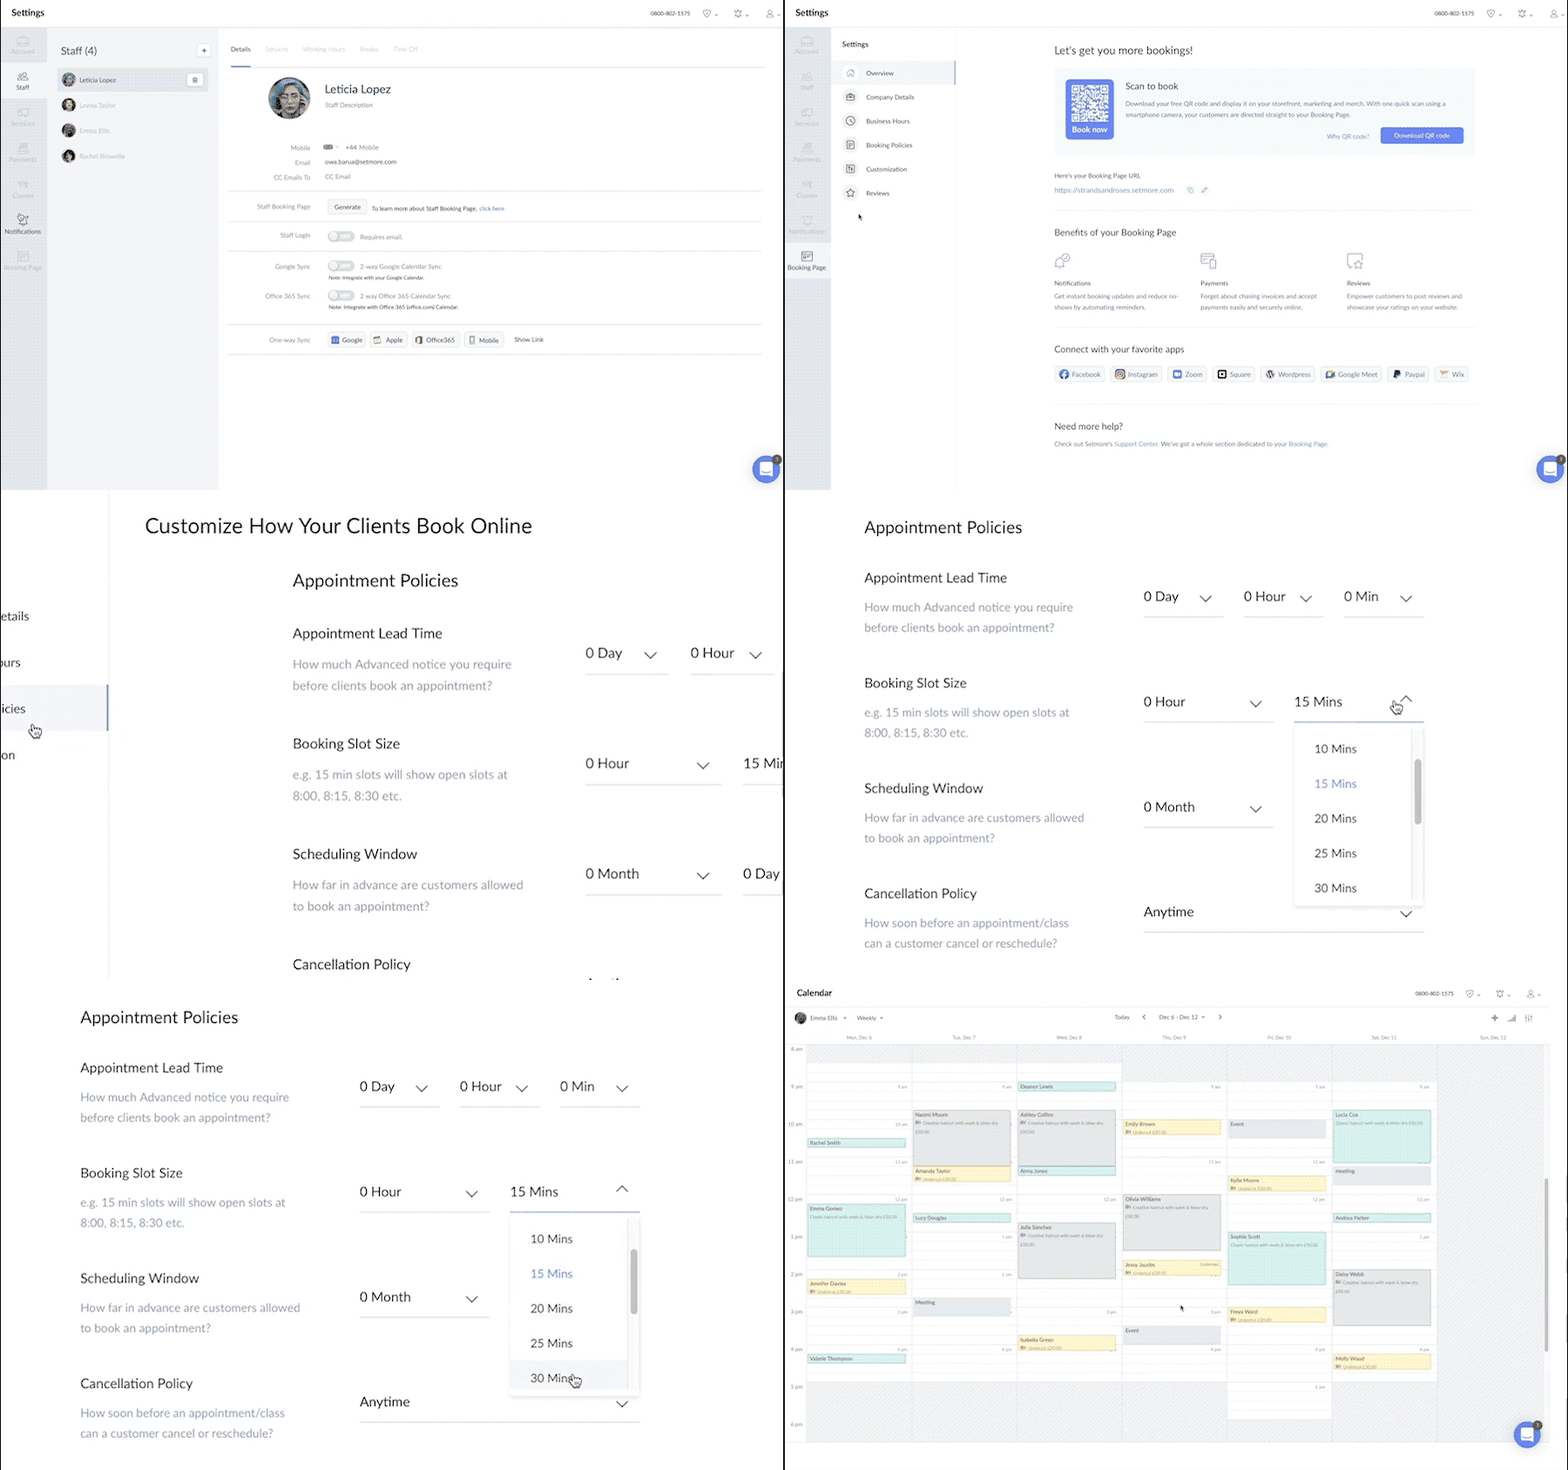
If you want to take a limited amount of appointments per day, or simply don’t have the resources to serve more than 2-3 customers per day, changing the booking slot size will help.
Booking slot size determines the intervals your calendar is divided into. For example, a booking slot size of 30 minutes will divide up your workday into half-hour intervals. A 45 minute service booked at 10am, therefore, will take up two half-hour increments and the next available appointment will be at 11am, not 10:45am.
(Side note: if you want the next appointment to be available at 10:45, specify the booking slot size as 15 minutes.)
1. To change the booking slot size, navigate to Settings > Booking Page > Booking Policies.
2. Scroll to the section titled ‘Booking Slot Size’.
3. Use the drop-down menus to alter slot size.
4. Click out of the drop-down menus to save changes.

By increasing the slot size, you can limit the number of appointments you receive in a day. So if you’re open from 9am to 5pm and want to take no more than 4 appointments per day, change the slot size to 2 hours. This will divide your workday into 4 even appointment slots – 2 hours each.
Incentive programs are important to show your appreciation for customer loyalty. Whether you share exclusive discounts via email or offer ‘Buy Ten, Get One Free’ on bookings, make it straightforward for your audience to act.
At the moment, Setmore doesn’t support a customer rewards system, but your Booking Page can include a space to accept promotional codes.
Log into your web app and navigate to Settings > Booking Page > Booking Policies.
1. Scroll down to the section titled ‘Contact Fields’.
2. Click ‘+ Add field’.
3. Type in a field title like ‘Coupon Code’, ‘Discount Code’ or ‘Reward Code’.
4. Click the ‘Save’ button to finalize changes.

The new field will now appear on your Booking Page. Visitors can add an incentive code during booking and Setmore saves it in their Customer Profile. You’re able to manually verify the code and apply a discount.
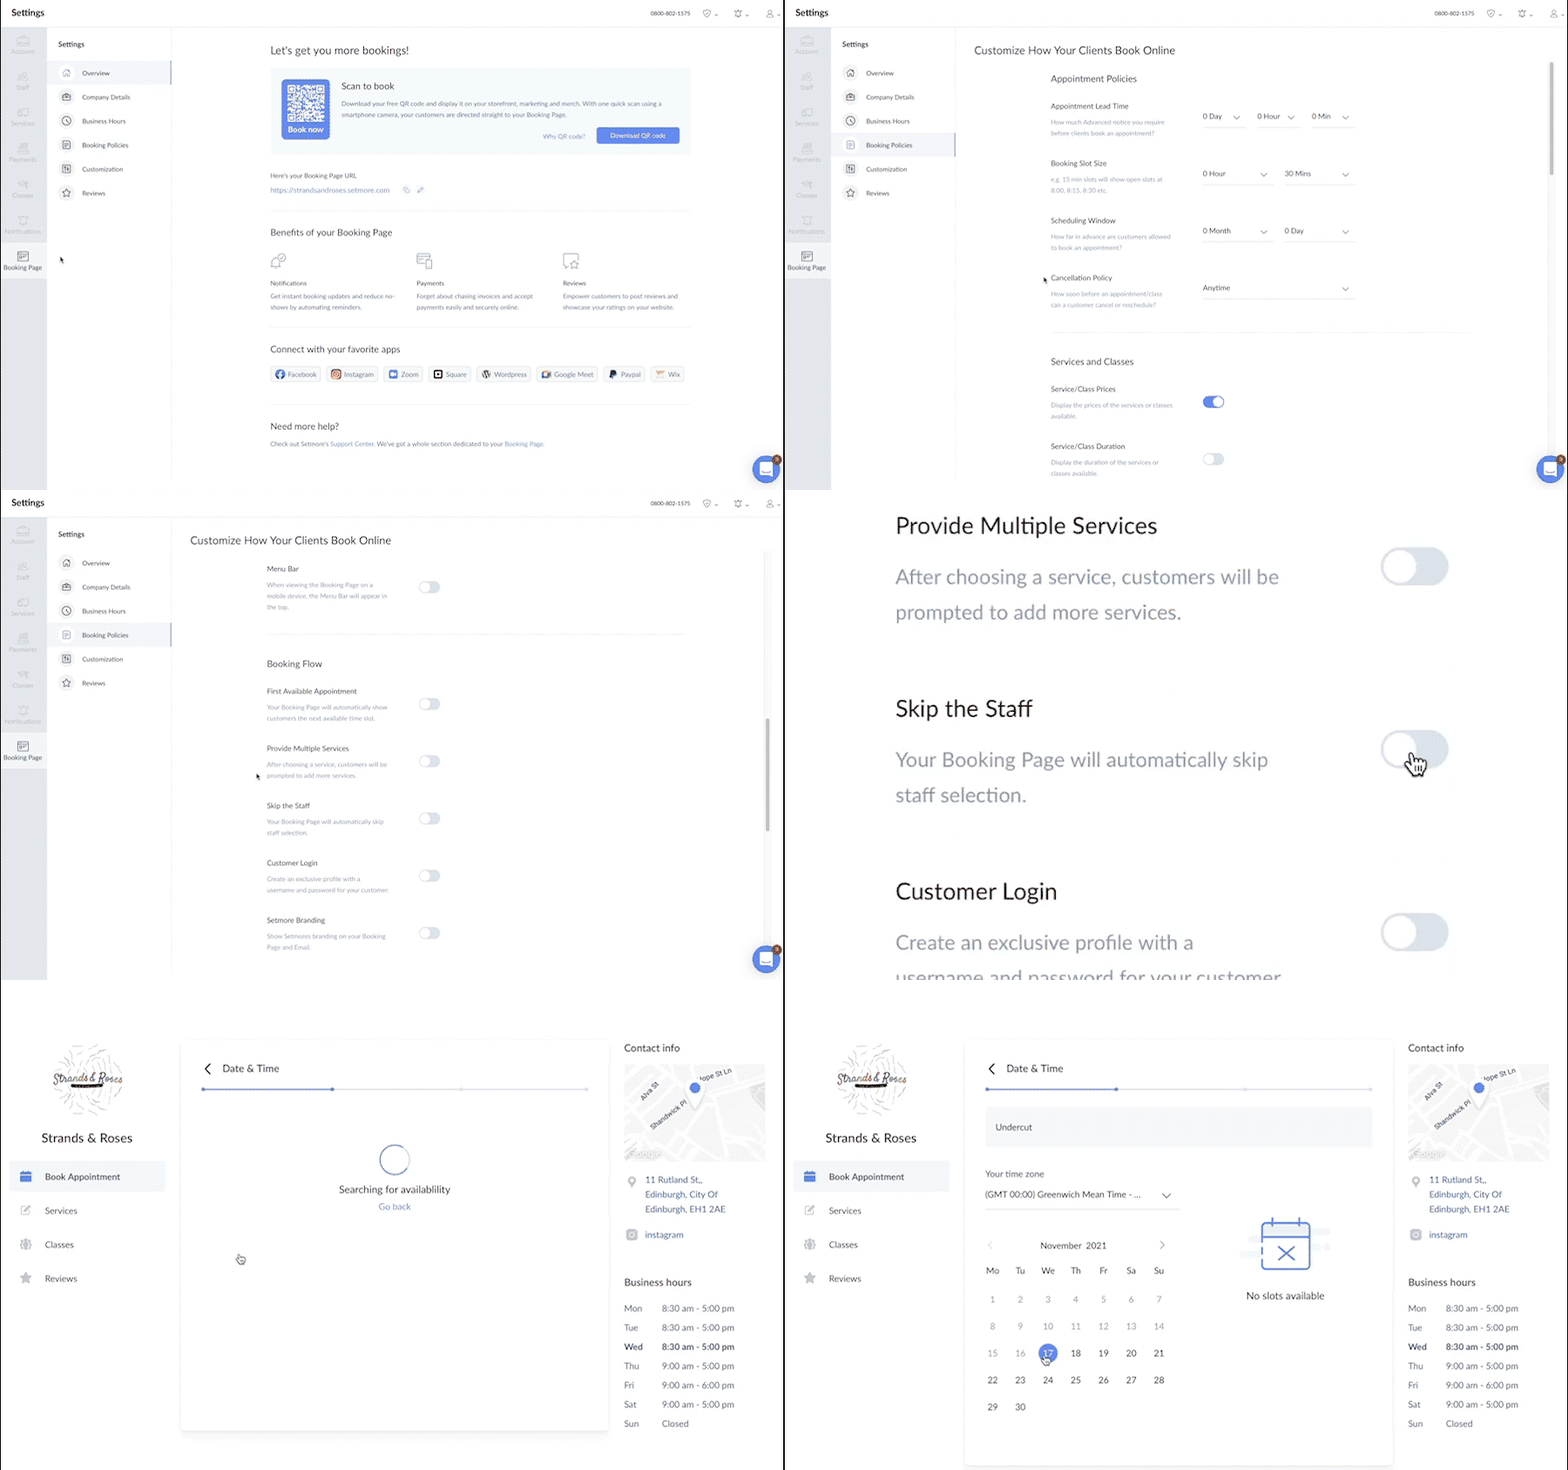
Independent contractors are most likely the only staff member in their Setmore account. But by default, your Booking Page requires customers to select a service provider.
If you want to streamline things, reducing the steps to confirm an appointment, activate ‘Skip the staff’. The first available (or in this case, the only available) staff member is automatically assigned to bookings.
Navigate to Settings > Booking Page > Booking Policies.
1. Scroll down to the section titled ‘Booking Flow’.
2. Flip the switch next to ‘Skip The Staff’.

That’s all there is to it. Your Booking Page directs customers from service to date selection, without prompting them to pick a provider.
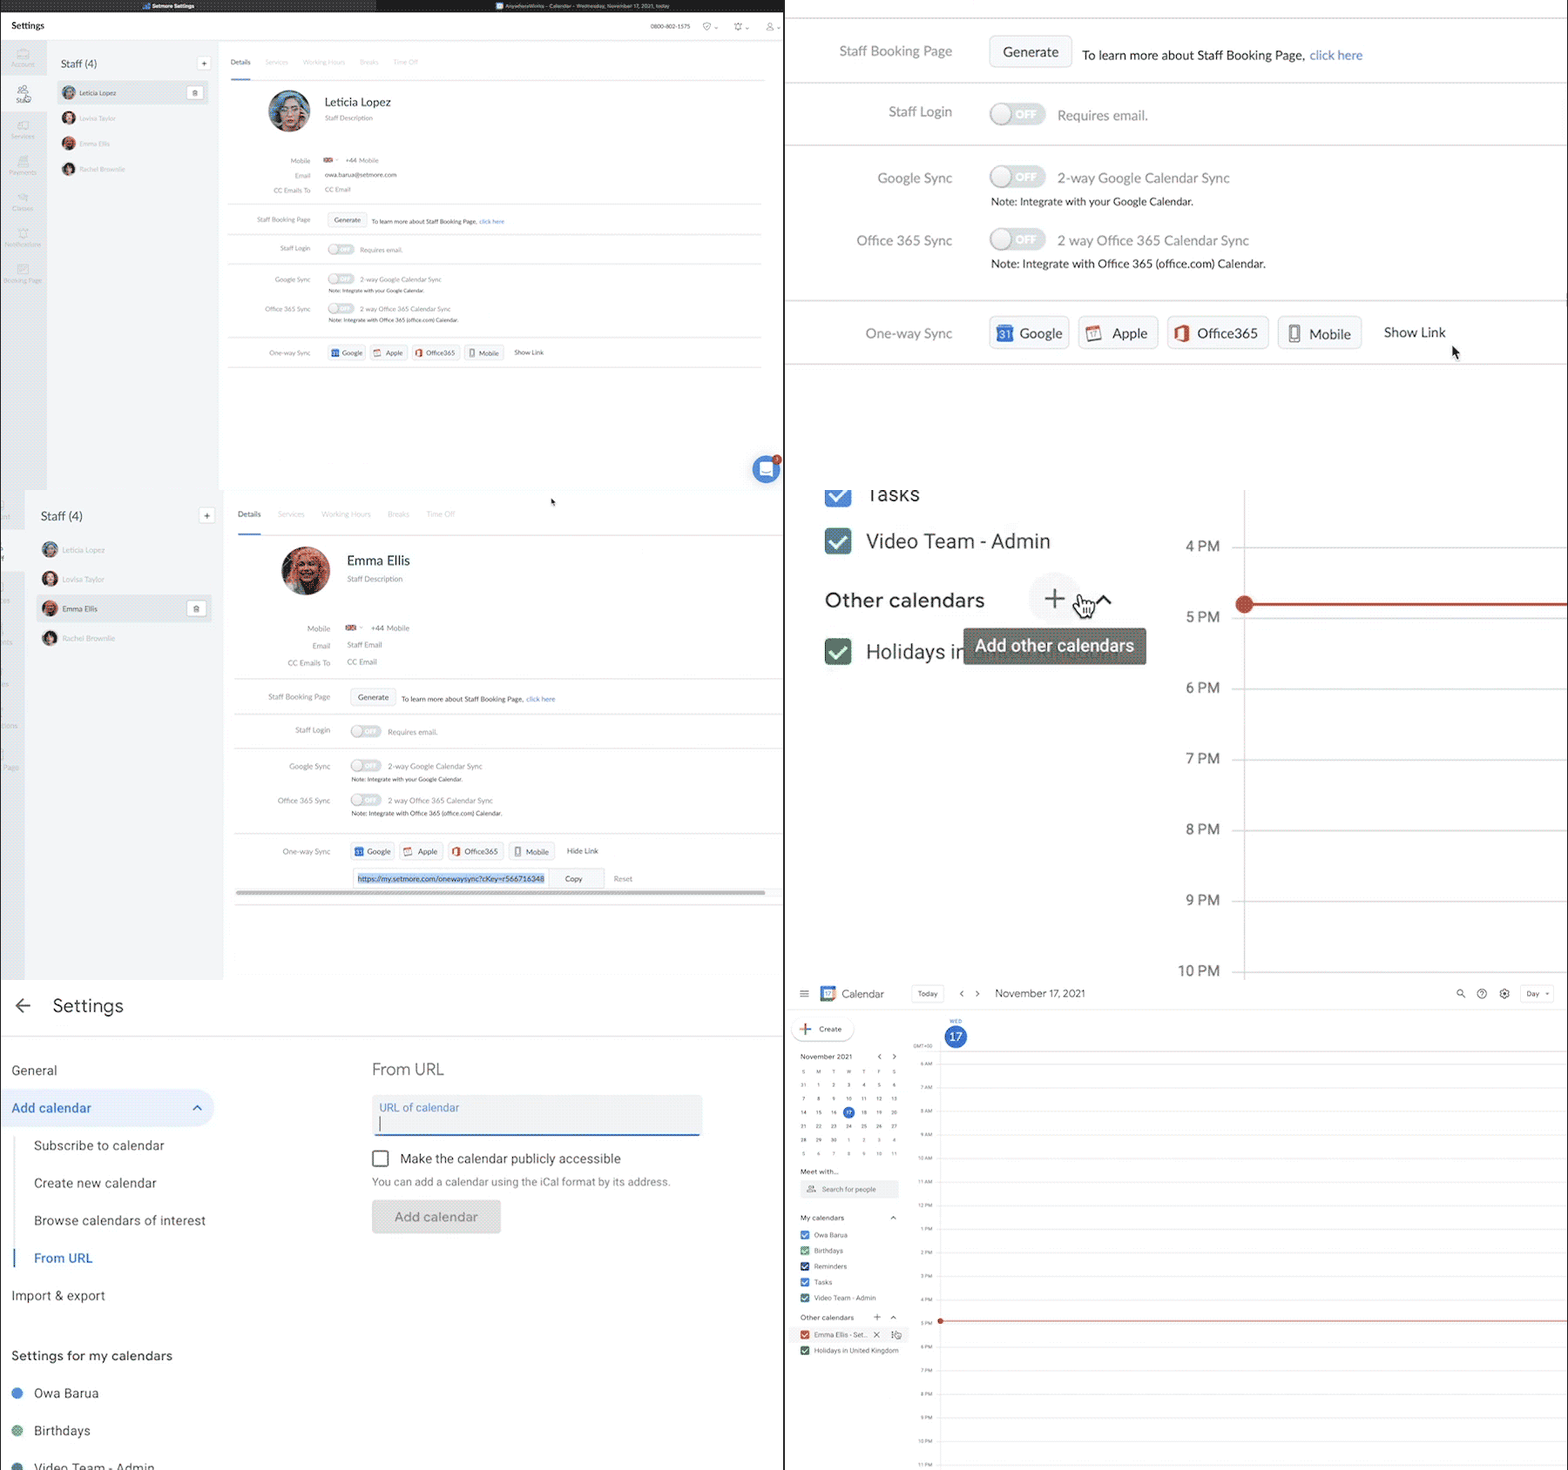
Your Setmore dashboard enables you to switch between all staff calendars, but right now, we don’t offer a consolidated view of all calendars. If you’d like this view, link your staff calendars to a single Google account.
The key benefit here is seeing all appointments in one place – for a day, week, month, or custom date range.
To start, log into your Setmore account and navigate to Settings > Staff.
1. Select a staff member and scroll down to the section titled ‘One-Way Sync’.
2. Click the ‘Show Link’ button and copy the link given in the URL field.
Open your Google Calendar in a new tab.
1. In the left-hand navigation next to ‘Other Calendars’, click the plus symbol. Select ‘From URL’.
2. Paste the calendar URL from Setmore and click ‘Add Calendar’.
3. Click the drop-down next to the calendar name to customize its color. This makes it easier to distinguish between multiple staff schedules.

Repeat this process for all staff members to create a centralized calendar. Heads up: It may take up to 8 hours for the sync to take effect. After that, your new appointments will copy over to Google automatically.
Stepping away from guidebooks can fuel the most creative ideas. All it takes is a slight adjustment in mindset: Instead of wondering “What does Setmore do?”, ask “What can I do with Setmore?”. We’re amazed by how many hacks our team and customers have found by doing just that.
For more ideas, check out our latest resources. Haven’t got your account yet? Sign up or book your free online demo. Happy scheduling!

by Setmore Appointments
Free, powerful online customer scheduling for businesses of all sizes.

